Setup
Wordpress install
- Go to https://my.interserver.net/index.php and choose the control panel for your hosting
- Click on Domains under Domains

3. Create a new domain

4. Click on SSL/TLS Status under Security

5. Click on Run AutoSSL
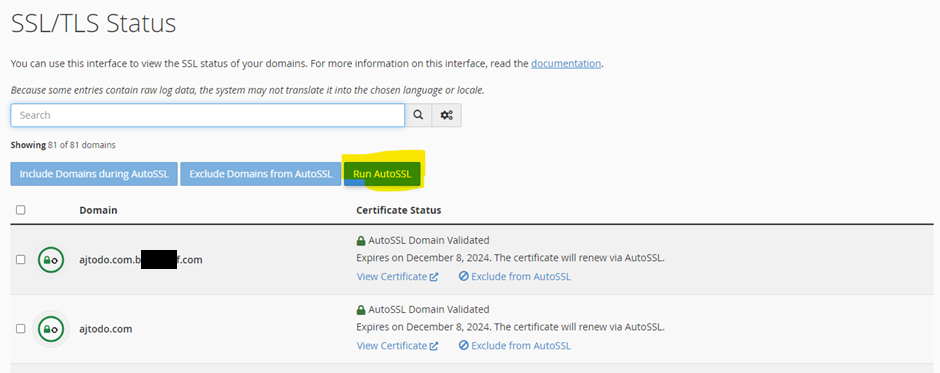
6. That should be it. If problems:
“You can check any SSL certification issues of any domains in https://www.whynopadlock.com . For ajtodo.com, the result is https://www.whynopadlock.com/results/82d84971-b822-4e43-8959-e5e10f8daa4e”
Adding force HTTPS in .htaccess will help to redirect any http traffic to https (I put it at the bottom of the file. Still not sure this is needed, I think not).
RewriteEngine On
RewriteCond %{HTTP_HOST} ajtodo\.com [NC]
RewriteCond %{SERVER_PORT} 80
RewriteRule ^(.*)$ https://ajtodo.com/$1 [R,L]
7. Click on Wordpress Manager (under Software)
8. Click Install, change the domain to your new one. Set up the site settings. Remember to remove the wp folder name after the URL (otherwise it gets installed to ajtodo.com/wp

9. Go to Domains > Redirects

10. Set the http -> https redirect:

11. Log in to https://ap.www.namecheap.com/ . Select the domain and change to Custom DNS:
dns3002a.trouble-free.net
dns3002b.trouble-free.net

Admin dashboard
- To administer the site, add the /wp-admin after the domain name.
Or go to software > wordpress manager

Then login:

Bricks install and setup
- Go to https://my.bricksbuilder.io/ and download the Bricks theme

2. Appearance > Themes > Add New Theme > Upload Theme


3. Activate the theme

4. Activate the license by going to https://my.bricksbuilder.io/, going to license, copying it, and pasting it in Wordpress


5. Go to Bricks > System Information. There are some things to change. Next steps shows how

6. Software > Multi INI Editor

7. Select domain. Set max execution time from 30 to 180

8. Files > File Manager

9. Edit the wp-config.php file

10. Add define( ‘WP_MEMORY_LIMIT’, ‘256M’ ); just above the “that’s all” line

11. Bricks > Settings > General
SVG uploads for administrator ON
Disable bricks open graph and SEO meta tags
Generate custom image sizes

12. Bricks > Settings > Templates > Disable Default templates

13. Disable auto save via Bricks > Settings > Builder > Disable autosave
Toolbar logo link > Dashboard and Open in new tab

Also collapse on page load and expand active element & scroll into view:

14. Bricks > Settings > Performance > Disable emojis, lazy loading, jquery migrate, set css loading to external files

15. Bricks > settings > Custom Code
Enable for administrator

16. Settings > PermaLinks > Post name as the post structure

17. Once you have a page, set it as the home page via Settings > Reading > A static page

18. Pages, select Privacy Policy and Sample Page, bulk actions > move to trash > Apply

19. Pages Add new page > Type Home then click Publish

Plugins setup
- Install WPCodeBox plugin (lifetime access needed)
- Install WPVivid. Be sure to setup a backup local – but also more importantly to Google Drive (Remote Storage):
